Showing posts with label Deployment. Show all posts

Tuesday, December 22, 2020

Developer inconvenience: Deploy Isolated WebPart with webApiPermissionRequests fails unless permission to create new Azure AD App Registration

In real-life enterprise context, it is advised to tag any SPFx webparts that will invoke an Azure AD protected API as isolated. This to prevent that other script running in same page, can abuse the OAuth access token assigned to the SPFx webpart and invoke any tenant-wide API permissions on behalf of current user.
However, you need to be aware of some deployment implications with Isolated WebParts. The first one is that in the Microsoft design, you can only deploy Isolated WebParts via the tenant AppCatalog. It is not possible to deploy an Isolated WebPart (only) to the site App Catalog where it will actualy be used. I suspect this is due that each Isolated SPFx WebPart creates a new Azure AD App Registration on tenant level, and for consistency the SPFx WebPart must therefore also be installed on tenant level. Negative result is that every site-specific customization is visible on all others sites where it likely is unusable. Luckily this visibility is initial limited to only the site owners in "Add an App". Only after a site owner explicit adds the Isolated WebPart to the site, then it will be visible in page editing mode in the available WebParts.
An even more significant inconvenience is that to successful deploy an Isolated WebPart, you need to have the authorization to create a new Azure AD App Registration. Without that permission, the deployment in tenant AppCatalog will fail with the generic error 'Deployment failed. Correlation Id ....'. Implication is that in effect the dependency on Ops is unnecessarily increased: a developer must reach out to a Global Admin for the deployment of SPFx solution containing Isolated WebPart. But the better option is that you request that Global Admin to assign your account the Application Developer role, then you are empowered to do this 'Ops' part yourself.

Thursday, June 20, 2019

Redeploy your SPFx Extension to SharePoint

One of the charms of SPFx Extensions is that they apply tenant-wide: they can be configured for immediate utilization in all modern site collections in your tenant. On SharePoint foundational level this works via the concept of good-old CustomAction that is injected into the context of each modern site collection. In the SPFx Extension package the CustomAction is configured as Feature deployment. Via the parameter 'skipFeatureDeployment' in the package-solution.json (see 'Tenant-scoped solution deployment for SharePoint Framework solutions') you can configure the SPFx Extension to be immediate available across all the sites in the tenant when the solution package is installed to the tenant app catalog, without need to explicit activate the CustomAction feature in each individual site.
This works out fine on the initial deployment of your SPFx extension: the deployed SPFx header automatically is included and active on each site.
On initial deploy, SPFx Extension included once in each modern site
However, in case of need for redeployment, you must be aware of a current glitch: the SPFx Extension gets multiplied per each re-deployment. The cause of this is in how the (semi)immediate and tenant-wide application of the CustomAction is applied. The CustomAction is not injected in the scope of each individual site (Web.UserCustomActions does not include the CustomAction of the SPFx Extension); but is injected as Tenant Wide Extensions. In case of "skipFeatureDeployment": true in the package-solution.json file, on upload / install of the .sppkg file in the tenant App Catalog the administrator is asked to set the 'Make this solution available to all sites in the organization' checkbox. If set, a row is added in the list 'Tenant Wide Extensions' in the App Catalog site. And on re-upload / redeploy, the checked setting is applied again, resulting in duplicate entries for the same SPFx Extension in the Tenant Wide Extensions list. This results that the CustomAction is applied multiple times per each site, and therefore that the SPFx Extension is included multiple times in each site...
As side-effect of re-deploy, SPFx Extension is multiplied in 'Tenant Wide Extensions' list
Result is that the SPFx Extension is included multiple times per each site
Correcting this faulty situation is simple once you know how-to (thanks to Vesa Vujonen for fast response on support question raised): just remove the duplicate entries from the Tenant Wide Extensions list. Mind you, it can take some elapse time before the effect of this is structural applied accross all the WFE's involved in serving the sites of one's tenant.
Fix by removing the duplicate rows in Tenant Wide Extensions
Then the SPFx Extension again included once, and referring to latest package version

Tuesday, January 19, 2016

Approach for inability to rollback an AddIn update

Our SharePoint governance prescribes to include in the runbook of any change to our SharePoint environment, the steps to roll back the change in case of unexpected issues. However, as we experienced, technical rollback to previous state is not possible for AddIn (former: SharePoint Apps) update. The AddIn framework does not support to remove/downgrade the AddIn update, and return to the previous version of installed AddIn as active version. The only option is to re-deploy the version previous to the update; but for this to succeed that previous version must be changed to receive a version number later than that of the failed AddIn update. This approach is only possible for company-build AddIns, but not feasible for purchased AddIns. And from purist perspective it is undesired, as it is not a removal but a compensating rollback to return to previous state of working AddIn. While technical still a change is executed in the environment: the updated AddIn remains deployed, and the previous AddIn version is installed twice, last time with increased version number to force the AddIn update to be executed.

Mitigation approach

To cope with the unavailability of a pure rollback for AddIn update, we instead apply a procedural approach to minimize the likelihood of failed AddIn update. In an isolated subsite, that is non-accessible for regular end-users, we prepare the same installation status of the AddIn we intend to upgrade. In the change runbook, we start with upgrading the AddIn in the isolated subsite, and validate the functionality there for the production environment. Only in case the validation succeeds, we continue with deployment of the AddIn upgrade in the production hostweb(s) to which end-users have access. And in the undesired situation that the validation fails, we stop the deployment, and only need to cleanup by removal of the isolated validation subsite.

Wednesday, December 9, 2015

Lessons learned with Add-In update execution

In our intranet we have Add-In instances installed throughout the site hierarchy. The content owners of subsites are enabled to utilize any of the provided set to their own will. In a release, IT takes care of automatic update of all the installed instances of Add-In(s) included in the release. This is done in a 2-fold approach:
  • Add the updated Add-In(s) to the SharePoint Add-In catalog;
  • Then first manual update ('Get It') the installed Add-In on the rootweb, for immediate result visible to end-users;
  • Next, via powershell script, update all the Add-In instances in the site hierarchy: traverse through the hierarchy, and on each hostweb that has the Add-In installed, execute 'Update-SPAppInstance'. Under the SharePoint hood, this delegates the Add-In update(s) to execution via a timerjob.
We've learned 3 important lessons with this Add-In update approach:
  1. The completion of the Add-In update throughout the site hierarchy is very time-consuming. In our intranet we've experienced elapse time of over 10 hours.
  2. Until the full completion of the Add-In update, it is not possible to manual update the same Add-In. Situation in which you want / need to do that - and we encountered one - is when in the release it is observed that after the Add-In update, the updated Add-In has an issue. As Add-In rollback is then not longer possible (once a Add-In update is executed), the remedy is to deploy a fix (on the update/fix).
  3. Most surprising: until the full completion of update of Add-In 'X', also the manual update of any other Add-In 'Y' is blocked for completion.
Lessons we took from these observations is that in intranet releases, we first complete all manual Add-In updates. This includes the potential additional installation of required 'fix' on 'updated Add-In'. And only once all manual Add-In updates are completed, and we have ascertained the effect of each is as expected; then execute the long-running Add-In update(s) via powershell maintenance script throughout the entire site hierarchy.

Friday, September 5, 2014

PowerShell to repeatedly provision SharePoint master and config data

The ease of creating and maintaining SharePoint lists also makes them a good option for application configuration. As example, in one application I applied SharePoint list as the configuration storage for task types specification, in another as the configuration storage of the specifications for BCS invocations via a generic BDC model. However, as easy it is to create a list; so it is also to delete one including the configuration contents. In particular in the development phase, with repeated solution deployment and feature de- and reactivation, typically the configuration list and thus its contents get deleted.
To cope with this, I utilize PowerShell to refill the list with the desired configurations. And the same PowerShell scripts are also of use for transition of the application from development landscape to QA, and ultimate to production.
Example:
# script Clear # Fill Configuration $webApp = “<url>" $ApplicationConfigList="/Lists/ApplicationConfiguration"   # functions   function X-CheckItemNotExists($list, $itemTitle) {    $camlQuery =       "<Where>          <Eq>             <FieldRef Name='Title' />             <Value Type='Text'>" + $itemTitle + "</Value>          </Eq>        </Where>"    $spQuery = new-object Microsoft.SharePoint.SPQuery    $spQuery.Query = $camlQuery    $spQuery.RowLimit = 1    $destItemCollection = $list.GetItems($spQuery)    return $destItemCollection.Count -eq 0 }   # Initialization   $spWeb = Get-SPWeb $webApp   # (Re)fill the Application Config Settings   $ApplicationConfigSettings = @{    "0" = @("<config-item title>", "AovpGetPerson ", "{0,8:D8}{1,30: 30}", "<SAP-system-ID>");    "1" = @("< config-item title>", "CrmGetCustomer", "{0,8:D8}{1,8:D8}", "<Oracle-system-ID>") }                                $spApplicationConfigList = $spWeb.GetList($ApplicationConfigList) foreach ($array in $ ApplicationConfigSettings.values) {    if (X-CheckItemNotExists -list $spApplicationConfigList -itemTitle $array[0].ToString())    {       $spApplicationConfigItem = $spApplicationConfigList.AddItem()       $spApplicationConfigItem["JsonMethodName"] = $array[0].ToString()       $spApplicationConfigItem["GenericModuleMethodName"] = $array[1].ToString()       $spApplicationConfigItem["CallInputParamsFormat"] = $array[2].ToString()        $spApplicationConfigItem["ExternalSystemAlias"] = $array[3].ToString()          $spApplicationConfigItem.Update()    } }    # Release   $spWeb.Dispose()

Sunday, October 28, 2012

Deploy custom Duet Enterprise scenario from Dev into SAP landscape

In the case that an organization develops custom business scenarios on top of Duet Enterprise foundation, an essential step is to implement it through to the organizations SAP production environment. Duet Enterprise relies herefore on the standard CTS+ transport mechanism.

Design time - prepare the custom business scenario

It is best practice to include all of the Duet Enterprise services for one scenario within an own isolated and recognizable namespace in the Gateway system. Each scenario will then be recognizable, and not per accident mingled with deliverables of another Duet Enterprise scenario. To achieve this, you create per business scenario an own Software Component in SLD, and use that to create in ESR an own Software Component Version and namespace.
Steps:
  1. Open SLD, and create a new Software Component
  2. Open ESR, and create a new Software Component Version via import of the newly created Software Component
  3. Create a namespace in the newly created Software Component Version
  4. Copy the Basic DataTypes from SAP IW TNG to the new Software Component Version and namespace
  5. Copy the Fault Message from SAP IW TNG to the new Software Component Version and namespace
  6. Activate the resulting changelist(s) in ESR
  7. Logon to Gateway system, transaction SE80; and create a Package
  8. Logon to Gateway system, transaction SProxy; and create + activate proxies for the Basic DataTypes, ExchangeFaultData and ExchangeLogData in the newly created Package.
With this, the preparation phase is completed. You now have an own business scenario container for all services that will be developed for the scenario.
That is, within the Dev environment. The same container must be created on the counterpart Gateway system into Test, QA and Production environments to implement the custom scenario in these environments. To facilitate this, all of the design time preparation steps performed on the Gateway system are recorded in a CTS+ Transport Workbench request: Create Package (step 7), and Create + Activate Proxies (step 8).
Note that it is not needed to also implement or repeat the SLD and ESR steps into the Test, QA and Production landscapes. For Duet Enterprise design time, the SLD and ESR only have a role in the design time phase; in the development environment. Once the service proxy objects for ESR content are generated (basic / standard ones, and the custom developed), there is no dependency on ESR content. The transport therefore only consists of the service definition(s) and the proxy objects that are part of them.

Design time - create the service definitions for the custom business scenario

Per service this consists of the 2 familiar actions: create and map a Gateway DataModel, and next generate the service definition + BDC Model for this Gateway DataModel (GSDO Type).
Steps:
  1. Logon to Gateway system, transaction SE80; and create a new Gateway DataModel; make sure not to select OData channel (Duet Enterprise 1.0 and SharePoint 2010 do not support OData consumption; this will change with Duet Enterprise 2.0 and SharePoint 2013). The system enforces you to include the creation of the Gateway DataModel in a Workbench request. The advice is to not include it in the same Workbench request from the preparation step, but instead use an own Workbench request for the design time deliverables. As result you have the implementation of the Package including the generic basic DataTypes + FaultMessage separated from the implementation of the specific scenario entities. It is typical in a custom realization project that you incremently build new versions of an own service definition, and if a previous version already transported you must be able to replace that while preserving the Package.
  2. Map 1 of more operations in the Gateway DataModel; e.g. Query and Read
  3. Generate the Gateway DataModel; the system enforces you to include the generation and creation of SAP entities within a Customizing request.
  4. Open transaction BDC Browser; if this is the first service definition for the custom business scenario, create a new Business Scenario. Otherwise you may opt to include the 2nd, 3rd and so on service definition all within the same Business scenario. I advice this as best practice, you then end up with a single Duet Enterprise Business Scenario that contains the entire set of Service Definitions developed for it. In case you create a new Business Scenario, it is again enforced by the system to include it within a customizing request. You can select the same as earlier created for the Gateway Model generation(s).
  5. Select the Business Scenario, and Create BDC Model for GSDO Type; select the Gateway Model earlier created. Also here the system enforces to include within a customizing request.
  6. [Optional] Open transaction SProxy, select the generated service interface and test its correct working for the diverse methods in the interface (e.g. Find, Read, Create, )
  7. [Optional] Open SOAMANAGER on Gateway system, browse to Business Scenario Configuration. Select your Business Scenario, and export + save into a local XML file.

Implementaton time - transport the custom business scenario

When the custom realization has progressed or is even completed in the Gateway system of the SAP Development environment, next is to propagate it within the SAP landscape.
Steps:
  1. Logon to Gateway system of SAP Dev environment, transaction SE03 or SE10; and release all the Workbench and Customizing requests that are related to the custom Duet Enterprise Business Scenario
  2. Logon to Gateway system of the transport target environment (SAP Test or QA environment), and open Transport Management System (TMS). Import the released Workbench and Customizing requests from the Development environment.
  3. Activate each of the requests. Make sure to do this in the correct logical order: first package, next the business scenario including service definitions.
  4. Logon to Gateway system of the transport target environment, transaction BDC Browser. Validate that the Business Scenario(s) is/are present. Also validate that for each of the imported service definitions, there is no end point yet.
  5. Release and activate all of the imported service definitions in SOAMANAGER. Browse to Business Scenario Configuration, and import the Business_Scenario XML file that is exported in the Development environment. If the Business Scenario already exists here from a previous import, first delete it. Or otherwise you can also explicitly associate new service definitions within a/the Business Scenario, and assign a profile. After activation of the service definitions, validate in transaction BDC Browser that for each of the service definitions now an end point is available.
  6. [Optional] Open transaction SProxy, select the imported service interface and test its correct working for the diverse methods in the interface (e.g. Find, Read, Create, )
  7. Transaction BDC Browser, select the imported Business Scenario and click on Export Business Scenario. Hand over the exported SharePoint BDC Model(s) to import within the SharePoint BCS Service Application of the implementation environment.
  8. [Optional] In SharePoint webapplication, create an ExternalList for one of the imported External Content Types. Validate that you can retrieve SAP data via Duet Enterprise and SAP Gateway using one of the transported / imported Gateway Service Definitions.

Monday, August 15, 2011

Deleted SPWeb in RecycleBin can obstruct deactivation of Sandboxed Solution

The other day, upon deactivating a Sandboxed Solution in our test farm, SharePoint aborted on it with the message:
Cannot access web-scoped feature {GUID} because it has references to a site with id {GUID}.
System.ArgumentException: Value does not fall within the expected range.
at Microsoft.SharePoint.SPWebCollection.get_Item(Guid id)
at Microsoft.SharePoint.SPFeatureEnumeratorBase.GetCachedWeb(SPSite site, Guid webId, Guid featureId)
We earlier encountered this problem in the development farm. Thorough investigation by SharePoint operations together with development led to the conclusion that the SharePoint content database had reached a corrupt state due deletion of a SPWeb. On that SPWeb a Feature provisioned via the Sandboxed Solution had been activated. And now after deletion of that SPWeb, apparently a lock internal in the SharePoint content database was present obstructing disablement of that Feature. And since it is not recommended - and certainly unsupported - to manually alter a SharePoint content database, there seemed no other realistic approach to get out of this erroneous situation as by recreating and reprovisioning the entire sitecollection.
For the development instance, this was an acceptable pragmatic solution. However, in our test environment a lot of content is already created by end-users. Just throwing away the SPSite and replacing it by a brand new, is not viable. The only remaining solution seemed to afterwards restore the backed-up content into the new SPSite. Not undoable, but it will take time [to setup and execute the site content restore; and next to validate the correctness and completeness of it]. And moreover, it will result in a loss of trust by our end-users and customer on the robustness of SharePoint 2010 as application platform. If it happens once [actually twice], what guarantee is there it will not happen again?
Luckily, then I had a smart thought while discussing the problem symptons with a co-developer. If the problem appeared to be caused by the deletion of a SPWeb, would it then help to restore this SPWeb instance from the RecycleBin? Worth a try. And guess what: it did!! After the earlier deleted SPWeb had been restored from the recyclebin, the earlier activated Sandboxed Solution could next successfully be deactivated.

Saturday, June 11, 2011

SPWebConfigModification playing tricks in farm

At customer premisses we apply a.o. the following deployment guidelines:
  1. In case of Farm-based deployment, then deploy to virtual bin (WebApplication), unless...
  2. Apply SharePoint support for all required web.config modifications; instead of manual action (which is error prone in the farm).
Both guidelines are valid from SharePoint operations AND development perspective, to ensure a consistent and controlled SharePoint farm situation.
The SharePoint platform provides multiple deployment functionalities to comply with the 2nd guideline. Via the SharePoint solution manifest, you can specify modifications that typically have effect on the runtime operation of an assembly: SafeControls, CodeAccessSecurity. And via the SPWebConfigModification class you can modify in a controlled manner the web.config for other changes; e.g. for custom application settings, navigation providers. As from SharePoint 2007, I'm a big fan of applying SPWebConfigModification - it gives you as developer full control to have the needed web.config modifications executed upon application deployment and/or provision time. And to make it even better: the same set of changes are applied to all the individual web.config files of the SharePoint webapplication in the total farm; accross zones and accross servers. Even when at a later time another server is added to the farm, the same set of web.config modifications are applied (rather, repeated) also on that new server.
However, the SPWebConfigModification functionality does have it's peculiarities. Lately we encountered one I was not yet aware of, and which caused us both some headaches as well as cost some elapsed time.
The situation is as follows: SharePoint assembly that uses EntLib 5.0 for accessing an external SQL database. Comform the guidelines, this custom assembly is deployed to the virtual bin; and it is therefore required to set custom CAS-policies for this assembly. One of the required permission is the SqlClientPermission. That permissions is not present in the default WSS_Minimal trustlevel, but it is within WSS_Medium. To have the total set of custom CAS-policies based on the Medium trustlevel, a 2-steps approach is applied:
  1. First change the trustlevel in the web.config from WSS_Minimal to WSS_Medium; a task performed via SPWebConfigModification class
  2. Next, deploy the SharePoint solution with in its manifest the CodeAccessSecurity element for the assembly. The resulting custom CAS-policy file is now based on the Medium trust level, thus inheriting a.o. the SqlClientPermission SecurityClass setting. The SharePoint solution framework takes care of the required modifications in the web.config: link to the generated custom policy file, and set the trustlevel to WSS_Custom.
The setup worked perfectly, both local as in the shared test-farm.
That is, initially. From time to time our application appeared broken. Root cause analysis exhibited that in those situations our web.config was modified; but without any deployment activity on our own webapplication (???) However, another SharePoint webapplication in the same farm had been redeployed. Each time that application was redeployed, our web.config was modified; and the trustlevel reset from WSS_Custom to WSS_Medium.
It appears that this is standard behaviour of the SPWebConfigModification class: each time that it is requested to apply administrated SPWebConfigModifications entries in the context of a single SPWebApplication, it effectively re-applies the administrated SPWebConfigModifications of ALL the SharePoint web-applications in the farm. At minimal, the result of this is that all the web.config files in the farm are touched; and have their timestamp updated. But in our case, the administrated SPWebConfigModification for setting the trustlevel to WSS_Medium was reapplied; which broke our application!
So I learned 2 things here:
  1. SPWebConfigModification is not a 'decent' SharePoint citizen; I regard it as ultimately incorrect that the intented application of SPWebConfigModification administrated entries on 1 SharePoint web-application, also effects all other SharePoint web-applications web.configs.
  2. That as result of this behaviour the considered 2-steps approach for setting the correct medium level of a.o. SQLClientPermission cannot be maintained; due the inherent risk that the administrated SPWebConfigModification can be re-applied at any moment; out of the control and knowledge of the administrators of our webapplication. So I modified this to set the CAS-policies in a single step; directly steered via the Solution manifest file.

    Thus instead of the below CodeAccessSecurity specification, which is relative and relies on the presence of a.o. SqlClientPermission SecurityClass in the base trust-level (WSS_Medium):

    <PermissionSet class="NamedPermissionSet" version="1">
    <IPermission class="SecurityPermission" version="1" Flags="Execution" />
    <IPermission class="AspNetHostingPermission" version="1" Level="Medium" />
    <IPermission class="SqlClientPermissionversion" version="1" Unrestricted="true" />
    <IPermission class="SqlClientPermission" version="1" Unrestricted="true" />
    <IPermission class="Microsoft.SharePoint.Security.SharePointPermission, Microsoft.SharePoint.Security, Version=14.0.0.0, Culture=neutral,
    PublicKeyToken=71e9bce111e9429c" version="1" ObjectModel="True" />
    <IPermission class="Microsoft.Office.SecureStoreService.Server.Security.SecureStorePermission, Microsoft.Office.SecureStoreService.Server.Security,
    Version=14.0.0.0, Culture=neutral, PublicKeyToken=71e9bce111e9429c" version="1" Unrestricted="true" />
    <IPermission class="System.Security.Permissions.ReflectionPermission, mscorlib, Version=2.0.0.0, Culture=neutral, PublicKeyToken=b77a5c561934e089" version="1"
    Unrestricted="true" />
    <IPermission class="System.Diagnostics.EventLogPermission, System, Version=2.0.0.0, Culture=neutral, PublicKeyToken=b77a5c561934e089" version="1"
    Unrestricted="true" />
    <IPermission class="WebPartPermission" version="1" Connections="True" />
    </PermissionSet>

    specify all the required permissions explicit:

    <PermissionSet class="NamedPermissionSet" version="1">
    <IPermission class="Microsoft.SharePoint.Security.SharePointPermission, Microsoft.SharePoint.Security, Version=14.0.0.0, Culture=neutral, PublicKeyToken=71e9bce111e9429c" version="1" ObjectModel="true" Unrestricted="true" />
    <IPermission class="SecurityPermission" version="1" Flags="Execution" Unrestricted="true" />
    <IPermission class="System.Web.AspNetHostingPermission, System, Version=2.0.0.0, Culture=neutral, PublicKeyToken=b77a5c561934e089" version="1" Level="Medium"/>
    <IPermission class="System.Data.SqlClient.SqlClientPermission, System.Data, Version=2.0.0.0, Culture=neutral, PublicKeyToken=b77a5c561934e089" version="1" Unrestricted="true"/>
    <IPermission class="Microsoft.Office.SecureStoreService.Server.Security.SecureStorePermission, Microsoft.Office.SecureStoreService.Server.Security, Version=14.0.0.0, Culture=neutral, PublicKeyToken=71e9bce111e9429c" version="1" Unrestricted="true" />
    <IPermission class="System.Security.Permissions.ReflectionPermission, mscorlib, Version=2.0.0.0, Culture=neutral, PublicKeyToken=b77a5c561934e089" version="1" Unrestricted="true" />
    <IPermission class="System.Diagnostics.EventLogPermission, System, Version=2.0.0.0, Culture=neutral, PublicKeyToken=b77a5c561934e089" version="1" Unrestricted="true" />
    <IPermission class="Microsoft.SharePoint.Security.WebPartPermission, Microsoft.SharePoint.Security, Version=14.0.0.0, Culture=neutral, PublicKeyToken=71e9bce111e9429c" version="1" Connections="True"/>
    </PermissionSet>

Friday, May 13, 2011

Automatically publishing multiple files fails with error '0x81020015'

In my previous post I wrote about the well-known artefact of sandbox solutions that provisioned files are by default still checked-out. This can be fixed via a FeatureReceiver that checks-in all files and approves the ones that require moderation, so that all provisioned SharePoint artefacts are direct available for the end user.
Initially this worked like a charm, and the problem seemed resolved. However when our project progressed and the number of provisioned files increased, we structurally encountered the following error upon feature activation:
Microsoft.SharePoint.SPException occurred
  Message=The file _catalogs/masterpage/ApplicationX/ApplXPageLayoutXX.aspx
    is modified by domain\WvStrien on May 11 2011 17:06:12 +0200.
  Source=Microsoft.SharePoint
  ErrorCode=-2130575305
  NativeErrorMessage=FAILED hr detected (hr = 0x81020015)
In the root cause analysis of the problem I discovered that the problem only manifests itself when more than 1 file requires approval. This also explained why initially we did not encounter the problem: we started out with only a single PageLayout. With this insight I did an internet search for '0x81020015'. Although no direct related pointers to our situation, this led me in the direction of the problem cause. Apparently it is a race condition within SharePoint internally when first checking in a file and immediately approving it in the same execution context. The internal SharePoint administration is typically not ready yet to handle the second state change on the file.
If this is the cause, then the solution is to break up the execution context: first do the checkin(), and in another execution context the approve() invocation. Normally you would do this by delegating it to a background thread. However, this is not possible in a Sandbox context: the SharePoint ObjectModel is only supported on the main thread of the SPUserWorker process. The best next and pragmatic approach is then to break the execution flow by introducing a delay between the invocation of the 2 SPFile methods:
private static void PublishFile(SPFile checkedOutFile, bool approvalNeeded)
{
  checkedOutFile.CheckIn(String.Empty, SPCheckinType.MajorCheckIn);
  if (approvalNeeded)
  {
    int nrOfWaits = 0;
    while (!checkedOutFile.Exists && nrOfWaits++ < 5)Thread.Sleep(1000);
    if (checkedOutFile.Exists)
     checkedOutFile.Web.GetFile(checkedOutFile.UniqueId).Approve(COMMENT);
  }
}

Wednesday, April 27, 2011

Error “Unable to load assembly group” upon redeploying a sandbox solution with a feature receiver

IT operations set up a fresh new SharePoint webapplication for my current project on the development farm, and provisioned it with a root site collection based on the publishing template. Next I took over the deployment control by following the sandbox route; in this preliminary phase merely to provision the first version of the branding: master page, CSS files, images and page layouts. A known artifact of sandbox solutions is that the provisioned files are by default still checked-out in the content database by the person who activated the solution, and thus not visible for anyone else. [It is a mysterie to me why Microsoft implemented it such; and moreover why they didn’t delivered us a setting to configure this provisioning behavior to automatic checkin and publish/activate the provisioned SharePoint artifacts.] Instead of manually via the browser or SharePoint Designer having to lookup in the site collection all the provisioned SharePoint artifacts to check them in and publish them, I more favor the approach to have this done automatically in the context of the feature activation. This can be easily accomplished via a feature receiver (Waldek Mastykarz has a good start/example for this in his blogpost Automatically publishing files provisioned with Sandboxed Solutions). So I added a feature receiver to the provisioning feature in the sandboxed solution, and in the FeatureActivated event let all the provisioned SharePoint artifacts be located in the content database and automatically checked in + published if applicable. Tested it locally, works like a charm. Deactivated and deleted the previous uploaded version of the sandboxed solution, and uploaded the new version with the feature receiver inside. However, upon activating this sandbox solution version, I consistently got the following error:
Error occurred in deployment step 'Add Solution': Unable to load assembly group. The user assembly group provider threw an exception while trying to provide user assemblies for the specified assembly group.
And in the ULS logging the following detail info:
Unable to load assembly group. The user assembly group provider threw an exception
Assembly Group Id: GroupId = "7C00665459714EEC9BDA8727AD711EC7-FES7hxwCdYldvtgExF/L+b259Rh3T1thWDeijNWTrSU="" - Inner Exception: System.ArgumentOutOfRangeException: Specified argument was out of the range of valid values.
at Microsoft.SharePoint.SPListItemCollection.get_Item(Int32 iIndex)
at Microsoft.SharePoint.Administration.SPSolutionLanguagePack.
GetSolutionInfoFromGallery(Guid siteId, Guid solutionId, String solutionHash, String& fileName, String& hash, Byte[]& fileBytes)
at Microsoft.SharePoint.UserCode.SPUserCodeLightweightSolutionAssemblyGroupProvider.
GetAssembliesInGroup(Guid siteId, String assemblyGroupId)
at Microsoft.SharePoint.UserCode.SPUserCodeAssemblyCacheManager.
EnsureUserCodeAssemblyGroupIsCached(Guid siteId, SPUserCodeAssemblyGroupId userCodeAssemblyGroupId)
An internet search did not give many nor useful hits; and neither could the SharePoint development gurus in my neighborhood help me. So it left me rather puzzled at first how to analyze and solve this. A good clue however was that a sandboxed solution from another SharePoint (web)application with also a feature receiver inside, had the same problem trying to activate it in our site collection, while it successfully activated in the own site collection. So it must be something at SharePoint infra level, not caused by code development. With this insight I went back to my operations companion, and provided him with a sandboxed solution to monitor what events occurred at system level upon trying to activate the solution. This quickly let to a conclusive result: somehow the permission state of the User Code service account on the C:\ProgramData\Microsoft\SharePoint\UCCache subfolder got compromized, which disallowed it to re-copy the new version of the sandboxed solution with code inside to the UCCache subfolder. The problem was not even resolved by restarting the User Code service; instead it was needed to manually reset the User Code service account, so that upon the next invocation the ACL on the UCCache subfolder was again built up.
Our operations guy was very thoughful to make a note of this behavior in the internal SharePoint operations Knowledge Base, and document it in a work instruction.

Tuesday, January 4, 2011

Solution partitioning and dependencies with mixed scopes causes farm-deployment trouble

We probably all agree that it is wise to partition your SharePoint application deliverables and deployment into multiple packages. Typical examples are a Base assembly, deployed via a base wsp, providing a general foundation layer with diverse technical and functional building blocks. And then 1 or more functional packages, that provision the SharePoint artifacts and code for a specific application functionality; in which the functional building blocks may use and rely on parts provided via the Base assembly.
However, sometimes this architectural sane decision to partition your application deployment, can result in unforeseen effect. Let me demonstrate via a real-life example, that I encountered today:
  • Application deployment deliverable
    1. includes a Base assembly, deployed via solution package Base.wsp. In this wsp package included the Base code, some basic Features, JobDefinitions, generic webparts. In the Base code / assembly there are FeatureReceivers, WebParts. As result of this, SharePoint solution generation (WSPBuilder or VS2010) puts SafeControl settings per contained WebPart in the Solution manifest; which again results in it that the scope of the Solution package is WebApplication.
    2. and also contains a pure functional package; with some Features, SiteTemplates. This functional package does not contain an assembly itself, but instead relies on the assembly of the Base.wsp for reused FeatureReceivers. As result this solution package does not contain any artifacts with are scoped at WebApplication level, and SharePoint solution framework requires to deploy it global in the farm. (nb: the further described situation can even occur in situation were the package does contain managed code, as long as the assembly does not contain SharePoint coded artifacts which transition the scope of the Solution package to WebApplication; e.g. no WebParts, Resources).
  • The order of Solution package deployment is to first install the Base.wsp, and then the Functional.wsp. Then you would expect that the deployment dependency of Functional.wsp on Base.wsp is ascertained. However, in this scenario I discover in the SharePoint Solution store an error with the deployment of Functional.wsp. Error details:
    <server 1> : The solution was successfully deployed.
    <server 2> : The solution was successfully deployed.
    <server 3> : Feature '<GUID>' could not be installed because the loading of event receiver assembly "Base, Version=1.0.0.0, Culture=neutral, PublicKeyToken=13a12821e9f69237" failed: System.IO.FileNotFoundException: Could not load file or assembly 'Base, Version=1.0.0.0, Culture=neutral, PublicKeyToken=13a12821e9f69237' or one of its dependencies. The system cannot find the file specified.
At first, I thought this to be a timing issue. The Solution Framework uses timer jobs to deploy solutions throughout the farm, and it looked as if the Functional.wsp was tried to be already deployed on <server 3> while the deployment job for Base.wsp was not yet executed for <server 3>. However, also upon re-deployment of Functional.wsp - while making sure at forehand that the deployment of Base.wsp was now fully completed in the farm - , it resulted in the same error on <server 3>. So it must instead be directly related to the installation on <server 3> apparently the Base.dll was not installed in the GAC on that server; while the Features within Functional.wsp were to be installed on <server 3>. Why is this?
Well, the explanation is twofold. It relates to the SharePoint Farm infrastructure, as well as the scopes of the SharePoint packages. <server 1> and <server 2> have the SharePoint webapplication role in our load-balanced farm; and each contain the SharePoint webapplications. <server 3> however is dedicated as Search Index server; and does not host any SharePoint web applications. The SharePoint solution framework deploys WebApplication scoped packages only to the servers on which SharePoint web applications are hosted (Base.wsp: <server 1> + <server 2>). But it deploys Global scoped packages to ALL the servers in the farmer (Functional.wsp: <server 1>, <server 2> AND <server 3>).
Given this insight, a proper SharePoint Solution Deployment approach is to deploy the Global scoped Package with Force-flag, thus suppressing the error signalment. This worked sufficient in our case. However, it leaves you with the somewhat unwanted situation that via the Force-flag you suppress all error notifications; thus may be too brute. A better approach is to circumvent that Solution Framework deploys your Application package also to the servers on which the web application is not hosted. This can thus be achieved by making sure that each of your Application package as WebApplication scope. Either because it inherently contains such entities (e.g. WebParts), or artificially by including a dummy artifact directed at WebApplication level (e.g. an empty virtual bin file).

Saturday, September 25, 2010

Debugging Error upon creating MySite

In a SharePoint intranet, feature stapling is applied to the standard MySite site definition to customize and extend the newly created employee’s MySite’s. After making some requested changes to the custom MySite masterpage, I deployed the SharePoint solution to the development farm. When validating that upon first visit an employee’s MySite is still successful and correct created, I got a runtime error. The display error message gave no details on the problem cause, and in the 12hive log no related information was found. Due a lack of rights to open the EventLog on the remote development server, I could not [myself] check whether in there useful logging was available.
So, what to do? Due the nature of my changes I was pretty sure that the malfunction could not be related back to them. But pretty sure is not good enough, when the ultimate deployment target is the company production intranet. I needed to exactly pinpoint the problem cause, and proof that it was not related to my deployment.
The SharePoint standard MySite creation handling hides the details of the thrown and catched exceptions. To detect what exception was thrown, I therefore created my own DebugMySite.aspx, and filled it with the basics of the standard MySite creation handling – with the noticeable difference to expose the exception details within the browser. Via this debugging approach I learned that the internal error message reported the following:
My Site creation failure for user '<domain>\<username>' for site url 'https://SharePointServer/personal/<username>'. The exception was:
Microsoft.Office.Server.UserProfiles.PersonalSiteCreateException: There has been an error creating the personal site ---> System.ArgumentException: Value does not fall within the expected range.
at Microsoft.SharePoint.Library.SPRequestInternalClass.SscCreateSite(Guid gApplicationId, String bstrUrl, String bstrServerRelativeUrl, Int32 lZone, Guid gSiteId, Guid gDatabaseId, String bstrDatabaseServer, String bstrDatabaseName, String bstrDatabaseUsername, String bstrDatabasePassword, String bstrTitle, String bstrDescription, UInt32 nLCID, String bstrWebTemplate, String bstrOwnerLogin, String bstrOwnerUserKey, String bstrOwnerName, String bstrOwnerEmail, String bstrSecondaryContactLogin, String bstrSecondaryContactUserKey, String bstrSecondaryContactName, String bstrSecondaryContactEmail, Boolean bADAccountMode)
at Microsoft.SharePoint.Library.SPRequest.SscCreateSite(Guid gApplicationId, String bstrUrl, String bstrServerRelativeUrl, Int32 lZone, Guid gSiteId, Guid gDatabaseId, String bstrDatabaseServer, String bstrDatabaseName, String bstrDatabaseUsername, String bstrDatabasePassword, String bstrTitle, String bstrDescription, UInt32 nLCID, String bstrWebTemplate, String bstrOwnerLogin, String bstrOwnerUserKey, String bstrOwnerName, String bstrOwnerEmail, String bstrSecondaryContactLogin, String bstrSecondaryContactUserKey, String bstrSecondaryContactName, String bstrSecondaryContactEmail, Boolean bADAccountMode)
at Microsoft.SharePoint.Administration.SPSiteCollection.Add(SPContentDatabase database, String siteUrl, String title, String description, UInt32 nLCID, String webTemplate, String ownerLogin, String ownerName, String ownerEmail, String secondaryContactLogin, String secondaryContactName, String secondaryContactEmail, String quotaTemplate, String sscRootWebUrl, Boolean useHostHeaderAsSiteName)
at Microsoft.SharePoint.SPSite.SelfServiceCreateSite(String siteUrl, String title, String description, UInt32 nLCID, String webTemplate, String ownerLogin, String ownerName, String ownerEmail, String contactLogin, String contactName, String contactEmail, String quotaTemplate)

With these error details, I could do a focussed search on the internet. And found this related forum-entry Error creating MySite: There has been an error creating the personal site, which had the answer: "add the account configured as the Application Pool Identity for the web site to the "Farm Administrators" group through the Central Administration pages". This was the situation earlier for the intranet webapplication on our development farm, but somehow this got broken. With this knowledge I went to our IT pro, and asked them to restate the AppPool identity as a farm admin, followed by an IISReset. After that, the MySite creation problem was solved.

Monday, July 12, 2010

Beware: timerjob processes invoked via Central Admin deploy solution do not reload FeatureReceiver assembly

Recent we ran into an exception when deploying an external facing website to the production SharePoint farm. The problem originated in the FeatureInstalled() method of a custom FeatureReceiver class. We did not encounter this particular deployment problem in the integration nor QA environment. Since on a production environment it is not viable to debug, we had to resort to inserting logging statements in the code, and then redeploy the assembly. But strangely, no logging was written leaving us still blank with respect to the exact code location and cause of the deployment problem.
After several deployment attempts together with operations, we came up with the explanation why the logging was not done. The timerjob process that executes the FeatureReceiver FeatureInstalled() method still has the old code loaded!! To force that the assembly is reloaded from either GAC or virtual bin after deploySolution and before execution of FeatureInstalled, you need to recycle the timerjobs processes. The right time for this is after the retractSolution of the previous version of the deployed SharePoint solution package.
NB: we didn't notice this 'faulty' deploy/timerjobs behaviour before because it's not very common to actually utilize the FeatureInstalled() method. In this particular case it was necessary to timely correct something before the SharePoint feature framework performs the OOTB feature activation work.

Tuesday, June 22, 2010

Test, QA and Production SharePoint infra should be comparable

In multiple SharePoint projects I have been confronted with delivered functionality succesfully validated in the test environment, does not operate the same in the QA environment. Since the application software is identical in the environments, the cause of the malfunctions must originate from differences at infrastructure level. Especially when it occurs in a later project stadium, this can be a very unpleasant surprise. Of course it's not realistic to expect nor demand that the Test, QA and Production environments are 100% comparable. However, the differences should be limited to hardware resources level; number of front-end servers, sizing of database, cpu, ... The infra architecture and configuration should be [logically] the same; load-balancing, firewall settings, proxy, Central Admin settings (e.g. Search, SSO, Policy for Web Application).
Extra complication to achieve such an ideal Test/QA/Production setup, is that typically the Test environment is much more volatile. This is the first environment to try-out your stuff, be it application functionality, infrastructure settings, or both. And in case of failure, not always the deployed trial stuff is rolled back. This is an extra argument to use virtualized Test environments per SharePoint project. When a new project start, an own Test environment is provisioned, with the current production state as its baseline. The project deploys all the project deliverables to this own Test environment. There is no overlap or conflicts with the work from other projects. And after project end (successful completion, or earlier stopped), the project Test environment can be deactivated and retired.

Tuesday, May 11, 2010

Unable to recover from a corrupted Publishing infrastructure

For a functional extension to the intranet (enterprise portal) of a client organization, we needed to provision a content page to an existing site. A precondition is thus that the Publishing infrastructure is activated within the context of that SharePoint site: at Site level (PublishingSite feature) and Web (PublishingWeb feature). Upon activating the latter we encountered the following error: Provisioning did not succeed. Details: Failed to create the 'Pages' library. OriginalException: The feature failed to activate because a list at 'Pages' already exists in this site. Delete or rename the list and try activating the feature again.
Strangly enough: via the SharePoint GUI the Pages library was not visible. Could be that it was set to hidden. But trying to directly navigate via its url merely resulted in a NotFound. Upon opening the site collection in SharePoint Designer, it showed there was a left-over of the Pages library: merely an empty folder, no Forms nor other content. But this presence was in the way of activating the Publishing feature. So we deleted this folder via SPD. And then tried to activate PublishingWeb feature again. This time it progressed a bit further, to stop with the message: The page you selected contains a list that does not exist. It may have been deleted by another user. Inspecting again: the Pages library was correctly available now, including associations with PublishingPage contenttypes. Missing this time was the Style Library documentlibrary. That is, when inspecting via SharePoint GUI. Again looking at filesystem level via SharePoint designer: same situation, Style Library folder present, but empty. Deleted this folder, and retried to activate the PublishingWeb feature. Sadly we kept on running into the error of missing List. Even after manually adding the Style Library; forcefully deactivate and re-activate the PublishingWeb feature. We did not manage to recover from the initial corrupted situation wrt Pages list. Search results on the Web for information on both the error messages gave some hits to problem descriptions, but sadly not to resolutions.
Due to a pressing time schedule, we therefore had to resort to a pragmatic alternative. Deleting the corrupted site collection, and re-creating it. This was a viable approach due to the current nature of the site collection: containing no content yet. But it leaves me with somewhat of a frustrated / disappointed mind. I would rather have seen us able to recover from the incorrect situation, while preserving the site collection.

Tuesday, January 26, 2010

AllUsersWebPart and SPWebApplication.ApplyWebConfigModifications don't match

  • In a Feature, I apply the AllUsersWebPart construct to automatically add default webparts to all publishing pages based on the PageLayout File.
  • In a Feature, I utilize the SPWebConfigModification class to add web.config modifications
When done in separate Features, both constructs operate successfully. However, when included within the same Feature activation, the invocation of ApplyWebConfigModifications method results in a SecurityException:
Access Denied
at Microsoft.SharePoint.Administration.SPPersistedObject.Update()
at Microsoft.SharePoint.Administration.SPWebApplication.ApplyWebConfigModifications()
at Microsoft.SharePoint.Administration.SPWebService.ApplyWebConfigModifications()
It looks as if internally SharePoint somehow puts a lock on the Administration persistent object. I tried to verify my suspicion via Reflector, but not surprisingly this internal code is obfuscated. The runtime error only manifests itself when the Feature is (re)activated via the GUI. The Feature activation via stsadm reports no problem, and successfully performs the deployment work.
Still, I want to hold on to the idea of one single self-contained Feature to deploy all the required parts. And I want to be able to turn the Feature on and off interactively via the SharePoint GUI (so that I can also operate the feature remote, without access to the deployment server). A resolution is to apply another approach to provision the default webparts on the pagelayouts. Besides the usage of AllUsersWebPart, it is also possible to directly include the webpart specifications in the PageLayout file itself:
With this construction, the invocation of SPWebApplication.ApplyWebConfigModifications method is done successfully. And as a bonus, also another problem is prevented; that of magically duplicating the default webparts provisioned via AllUsersWebPart upon Feature re-activation.
A final word of caution. With this approach I at first encountered another problem. When editing on a created publishing page the properties of the default WebPart provisioned via the PageLayout file, SharePoint displayed an error warning in the edit toolpane, "a web part you attempted to change is either invalid or has been removed by another user". Although the net effect of the WebPart settings is simple done, this is not very trustwordy towards the Web Content Manager. Hard to explain that they can just ignore this warning. Before deciding to then have to abandon the approach, I re-examed the default WebPart specification in the PageLayout file to see if anything there could be causing SharePoint to suspect a concurrent update. And yes there was, 'thanx' to the automatic editing behaviour of Visual Studio. When you add a control within an .aspx file, Visual Studio automatically add a default 'ID' property to the control. For the default WebPart however this is not needed, the property is actually set when creating a publishing page off this PageLayout. But the mere presence of it in the default part results in SharePoint detecting a concurrent update. So remember to don't include the 'ID' property within WebPart specifications included within PageLayout files.

Tuesday, January 5, 2010

Automatic publish InfoPath forms via Feature-based ALM deployment

Fixed the Feature-based deployment of InfoPath forms to SharePoint site while treating them as first-class source artifacts in VS + TFS environment

I’m a supporter of applying Application Lifecycle Management (ALM) principles within application development projects. This also goes for SharePoint-based custom applications. Basically this means:
  1. designing and developing the SharePoint artifacts within a team-based source repository environment (aka, Team Foundation Server);
  2. applying version control to the individual application/building blocks;
  3. daily build;
  4. and full automatic and repeatable deployments
With InfoPath development, this gives some challenges. First of all, the InfoPath forms are setup and maintained via its own designer-tool, namely the InfoPath Designer client; and not directly from within the scope of Visual Studio. However, the most significant issue is the manner of deployment: the InfoPath client contains functionality to publish the InfoPath form to the destination environment, with SharePoint site as one of the available options. Given my ALM aspirations, I want to copy this InfoPath client deployment-experience to within the regular SharePoint deployments, via the Solution framework and SharePoint Features. In essence, I want to achieve the following:
  1. Automatically provision the required Information Architecture artifacts:
    • SiteColumns
    • Masterdata for LookupFields
    • ContentTypes
    • Forms Libraries, associated with the ContentTypes, for administration of the filled in InfoPath forms
  2. Automatically provision and activate the required InfoPath infrastructure
    • InfoPath forms
    • DataConnections
The first category, the Information Architecture artifacts, is well-known SharePoint provisioning. It can be done via a Site Definition, Features, or a combination. I favor the Feature-based approach, because it is modular, and allows me to turn it off and on.
The second category gave me more challenges. On internet search, I came across some posts that mentioned the SharePoint OOTB XSNFeatureReceiver that aids in here. However, it quickly appeared to me that it only takes care of one part, namely registrating the InfoPath form templates within the target SharePoint site. To successfully achieve this, XSNFeatureReceiver has constraints on the deployable InfoPath forms. And when even a single one of them does not comply to these constraints, XSNFeatureReceiver rather silently fails to correctly install the forms. Another missing part is for the DataConnections. The upload is not the issue here, being standard SharePoint Module functionality. But rather adjusting them to the specific target environment. In my ALM principles, I want to hold on to 1 single instance per DataConnection file, and not be forced to maintain versions for each of them per target environment (development, test, staging, production).
Luckily, Microsoft has not made XSNReceiverFeature sealed. So I decided to overload it to augment the standard deployment functionality with the above described aspects. Adjusting the DataConnections appeared rather simple, with thanks to this blog (Building InfoPath Form Services Solutions using Visual Studio 2008), including a link to demo provision code. I took this as basis to realize a generic approach, feeded by an XML configuration file delivered within the feature scope
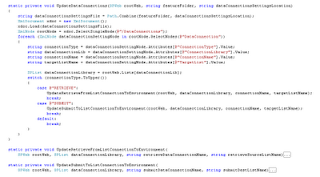
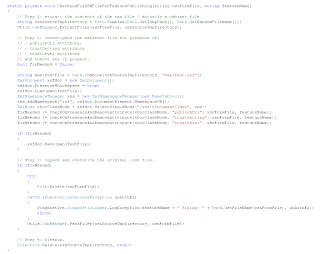
The correct deployment of the InfoPath forms appeared to be more of a challenge. Eventually, I found out that the direct cause of the failed deployment was that I earlier on published the forms during my development and testing of the forms. As soon as you publish an InfoPath form, the InfoPath client administrates this within the form itself. And this appeared to result in the malfunctioning XSNFeatureReceiver based InfoPath forms registration. This can be mitiligated by correcting the InfoPath forms. An alternative is to modify the original InfoPath form artifacts. However, this would then be a corrective action to be repeated every time you’d published an InfoPath form just for an InfoPath designer (programmer) test. I therefore went for the alternative to do the correction as part of the Feature installation procedure. This way during the development phase the team can just go one and (re)publish the forms, without worrying about the effect on deployment later on.
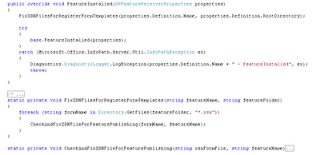

Another thing to take into account when doing Feature-based deployment of InfoPath forms, is that the Forms must be contained at the Feature root-directory. I like to structure Feature contents within subfolders for different deployable types. ContentTypes, SiteColumns, DataConnections, and also InfoPath forms, each within their own subfolders within the feature. However, in case of InfoPath forms deployed via XSNFeatureReceiver, this is not working. Without a concrete error message, the registrating will then just not be performed. So keep your Forms at the Feature root-level.

Deployment steps, and thus functionality of InfoPathInfrastructure feature

Upon Feature installation event:

  1. Fix the forms files, for successful automatic publishing via XSNFeatureReceiver
    • Extract the forms; this on itself presented a challenge, since .NET does not provide standard cabinet (.cab) handling
    • Inspect the manifest.xsf file on the presence of publishUrl and trustLevel; remove any of them present
    • Repack the .xsn container / file

Within the Feature Activation:

  1. upload forms files to FormsServerTemplate library
  2. Registrate the forms
  3. upload data connections to DataConnections library
  4. provision site columns
  5. provision master data lists
  6. fix the lookup references
  7. provision content types; including reference to the uploaded forms
  8. provision contents/data libraries
  9. assign content types to the contents libraries
  10. fix retrieve data connections --> associate with the master data list in the deploy environment (iso your local / development source)
  11. fix submit data connection --> associate with the content data list in the deploy environment (iso your local / development source)

Monday, September 21, 2009

Tip - HowTo package multiple project-assemblies in a single WPF executable

It's a good practice to structure your Visual Studio solution according to the application layers. You can do that via a folder structure within a single project. But I prefer to structure each application layer within it's own VS project. This approach allows (the build of) each VS project to depend only on the architectural layer direct beneath it.
A consequence of structuring within multiple VS projects, is that each project will build its own assembly file. Often this is also required for deployment and update flexibility. Sometimes however its handier to package it all within a single assembly for deployment. An example is the build of a WPF .exe. Especially for a smaller application, it's a bit overdone to have to deploy one or more .dll assemblies besides the .exe.
Luckily it's easy possible to also package the other project-assemblies within the main .exe executable. The tool to the rescue here is ILMerge. You can modify the project file to automatically merge the dependant .dll assemblies within your main .exe:
<PropertyGroup>
<PostBuildEvent>ILMerge.exe /internalize /ndebug /out:$(TargetFileName) $(TargetFileName) TopForce.Communication.Application.dll TopForce.Communication.Integration.dll</PostBuildEvent>
</PropertyGroup>

Thursday, July 16, 2009

Tip - Silverlight's AsyncCallbackException on invoking WCF service

A Silverlight application deployed to the testserver gave a browser error upon invoking a WCF service. This WCF service is running on the same testserver. The error message is:
Error: Unhandled exception in Silverlight2 application [AsyncCallbackException]
According to the callstack, the error occurred somewhere in the completion of the asynchronous WCF call. This makes the bug analysis somewhat trickier, since you cannot simple use System.Windows.Browser.HtmlPage.Window.Alert then. The call completion namely does not run at the UI thread. However, searching around gave me an idea of the problem cause: I forgot to deploy a clientaccesspolicy.xml file within the folder of the deployed WCF service. Copied it there, and the call from the Silverlight client executes successfully.

Tuesday, July 7, 2009

Workaround shortcoming of SPWebConfigModification behavior wrt explicit positioning childNode

I structurally apply the SPWebConfigModification class upon all my SharePoint deployments to propagate the needed web.config modifications to the target environment (be it my local VM or in test/staging/production environments, typically in a farm). Benefits of using this functionality are:
  • All web.config modifications are done automatically. No need to have someone (yourself or in production, IT operations) do this manually by editing the web.config file(s);
  • Addition of the modifications becomes part of your ALM process; they can be tested and validated before going to production, and repeatedly fully automatic executed;
  • The same web.config modifications are propagated throughout the entire farm; and even when later on a new WFE or a new extension is added;
  • Added modifications can also be neatly removed upon uninstalling your SharePoint application.
Although I’m a big fan of this functionality, I’m also aware of some of its shortcomings. One of this is that upon adding a new childNode, it will always be appended as the last childNode in its parent webconfig node. Sometimes this is not good enough, and you need to be able to have it inserted at a specific position. In my case it was needed for enabling an ExceptionHandler HttpModule. To have this correctly operating, it must be the first active httpModule in the pipeline. Typically however the httpModules section in the web.config already has multiple httpModule nodes added:

Initial HttpModules section for a new provisioned publishing portal

The standard behavior of SPWebConfigModification places my ExceptionHandler behind them, effectively making it non-function. I could resort to manually correct my / all the web.configs; yeah right, you gotta be kidding…
Instead I decided to devote some time to investigate how to make a full-automatic correction for this. Via Reflector I inspected the runtime operation of the SharePoint ApplyWebConfigModifications method. Then I did an attempt to ‘break in’ on this functionality by a combination of first removing the already present httpModule childnodes, next add my exceptionHandler so it be the first, and then add the original httpModule nodes again. However, this was unsuccessful; and the outcome unpredictable. I suspect that an explanation for this is that my application is not the ‘owner’ of the (re)moved nodes. But that is hard to determine, since that requires a deep insight in the inner internals of this SharePoint behavior. After this I came up with a solution to correct the sequence in the httpModules afterwards the invocation of SharePoint’s ApplyWebConfigModifications. And this works satisfactory!! I must admit it has one weakness in that this afterwards correction will not be applied when later the farm is extended with new servers or web app zones. But honestly, seeing the SPWebConfigModification code I do not have a clue to make that happen. Another issue to watch out for is that SharePoint administrates in its config database all commanded web.config modifications, and reapplies them all upon each ApplyWebConfigModifications. I solved that by administrating in SharePoint’s PropertyBag the name of the ExceptionHandler, and then after each invocation of ApplyWebConfigModifications invoke the correct positioning of this HttpModule.
Code extracts:

1. Detect whether an ExceptionHandler HttpModule is provisioned

2. Set required ordering of childNode in each web.config
And ultimately, this gives me the desired system/debug-enabling functionality in the deployed application:
Oops, apparently I've forgotten to enable an implementation for the IExpensesHandling interface...