Showing posts with label Tip. Show all posts

Monday, December 23, 2024

How-to join as B2B guest a Teams meeting with ‘bypass lobby’

The lobby function in Teams gives some control over who joins a meeting, and when to allow entrance. This capability is convenient to prevent unknown people join your meeting. For known persons, it can be preferred to have ‘an open door’ policy. This can be configured via Teams policies, including for Entra ID B2B guests as known + trusted identities. However, to actual bypass the lobby, does require some ‘trickery’ on the guest side. The trick is to make sure you are indeed in a ‘known’ state in the inviting tenant; as “Unverified” you will still need to wait and enter via the lobby.
Teams Policy to allow B2B guests to bypass lobby
Join meeting in external organizing tenat still routes to lobby
Inspecting the situation from the inviting side gives indication on why the B2B guest is not automatic allowed in: the identity is not 'verified' as known:
2 ways to direct join as Entra ID B2B guest, bypassing lobby
Approach 1 is to explicit self change to the organizing tenant, before joining the meeting:
The 2nd approach is the most simple and seamless, direct join the meeting from the notification popup that the meeting is started in external tenant:
Both approaches result that on moment of joining the Teams Meeting, in the context of organizing tenant the joiner is verified as a known B2B guest, and therefore allowed to direct enter - bypassing the lobby:

Saturday, April 9, 2022

Too compulsive cleaning up PnPSearchResults SelectedProperties can destroy some of its behaviors

I utilize PnP Modern Search v4 for a business search solution on data that is administrated in a SharePoint list. In the business solution I display multiple list columns in the search results layout (Details List), and thus need to ensure that their mapped managed properties are included in 'selectedProperties' of the PnP Search Results webpart. Default already a lot of other properties are included in the configuration, some of which are not even present in the SharePoint list, and others that I do not intend to use. So as good citizen I limit the 'selectedProperties' to only "what you need / want to display":
Well, this good citizenship resulted that some behavior was broken: it no longer worked to open a listitem from the PnP Search Results overview. Direct cause was the property 'PreviewUrl' was without a value in the mapped search results Slots, and this was result that I excluded 'Path' from the 'selectedProperties'. Lesson: although good to limit data retrieval to only what you need; you also must have understanding of 'for what purpose you may need'.
See for more details: PnP Modern Search - Slots

Sunday, March 20, 2022

How-to Join as external attendee an access-controlled Teams Live Event without explicit Teams Guest Access

MS Teams Live Event is current the only service in the Microsoft 365 landscape that enables audience outside the own organization. Teams Live Event supports both full public (anonymous) Live Events without any access control, as well as Live Events with the permission mode 'People and Groups'. In the last mode, also externals can on named base be allowed by applying the Azure AD B2B guest concept. Besides that (1) the external must be known in the identity system of the tenant in which the Teams Live Event is produced, another requirement (2) is that the external must switch in Teams first to that tenant aka 'Organization' before allowed to join the Teams Live Event.
For reference, below the prerequisites to enable external to attend a Teams Live Event in your tenant.
On Organizing part
  • For each external that needs to be granted access, provision an Azure AD B2B guest account
  • Schedule in Teams a Live Event, with permission type: People and Groups
  • Authorize all the externals via their provisioned Azure AD B2B guest account for access to that Teams Live Event
  • Share the attendee link with the invited externals
Per external
  • Redeem the provisioned Azure AD B2B guest account
  • Enroll for Azure MFA via MS Authenticator App; against the organizing tenant
  • In Teams context; first explicit switch to ‘<organizing> tenant’ ⇒ without this, Teams displays message that you are prohibited to access
  • Then click the attendee link ⇒ and the external will be allowed to access
Externals that are authorized via Teams Guest Access concept in any arbitrary team in the organizing tenant, can do this 'tenant-switch' direct in the Teams App and web application, via so-called 'tenant-switcher':
For externals that are not within any team, there is no reason for the Teams App and web application to list that tenant as organization within the 'tenant-switcher'. The easy way out is then to just add all the authorized externals to 'a' team in the organizing tenant. But for multiple reasons this is not always a preferred / good approach. For one, it doesn't "feel right" to add persons to a team with its full set of capabilities, only because they are invited to participate in a temporary digital event. Also as all members of a team instance can 'see' all the other members, and then contact each other; via teams chat, or via the discovered email addresses. For privacy and compliance reasons the event organization might not want this, or even not be allowed to do. Another reason has to do with timing aspect: in the Teams operational model it takes unpredictable yet significant time (can take up to 36 hours) after adding an external to a team instance, before the external sees the effect of this in the 'tenant-switcher' of the own local Teams App.
Luckily there is an alternative approach in which the externals can do the 'tenant-switch'. Namely by visiting in the browser the link "https://teams.microsoft.com/?tenantId=<organizing tenant-id>". The external must then sign-in via his/her Azure AD B2B guest account, and typical also answer on multi-factor authentication challenge (imposed by the organizing / inviting tenant), and if both successful the external is then allowed in the Teams context of the event organization. For the externals that are not member of any team, Teams will display the message "You’re currently not part of any teams…".
And now from this context in Teams, the external can join via the attendee link the Teams Live Event. Be aware that this approach only works from the browser via Teams web application, the external can not watch the live event in the Teams App. But on user experience that makes no difference; Teams App and Teams web application have same behavior wrt Teams Live Event.
Update:It is also possible to achieve both via one single link: making the attendee link of the Teams Live Event tenant-switch enabled. The trick is to insert "/_?tenantId=<organizing tenant-id>" immediate after "https://teams.microsoft.com" and before the "/l/meetup-join/..." part. On navigating to this link, the browser (1) first switches in Teams Web Application to the referred tenant, and (2) next from that context it joins the Teams Live Event in that same tenant.

Saturday, March 19, 2022

Best-practices for delivering webcast via Teams Meeting

Complementary to post Bad-Practice: Include 'presentation / video production' as camera input in MS Teams Meeting + Teams Live Event, here some best-practices to apply upon delivering a webcast / digital event via Teams Meeting.
Tips to practice / try-out:
  1. Ensure that the workstation on which you 'produce/present' the digital event, and are including camera, audio and likely also content, is qua CPU and memory sufficient equiped for it. And close all other applications, in particular CPU, memory and/or network intensive, on it during the period of the digital event production.
  2. Be in particular careful with using OBS Studio on that same workstation. I love OBS for its webcast / digital events capabilities, but it puts extensive strain on the workstation. Together with Teams Meeting, this might become a bottleneck; and result that the production in Teams Meeting suffers. Better to have OBS on another workstation, and cast its output to the workstation on which presenting in Teams Meeting.
  3. In the Teams Meeting where the webcast is produced, turn off 'incoming video' of the attendees aka audience.
  4. If possible, connect to wired iso wifi; prevent potential disruption of WIFI signal, hotspots, others consumers.
  5. Dedicate the 'presenter' role to only those persons that will actually present; avoid the role is assigned to everyone in the audience.
  6. In case you need 'access-control' on who is allowed as audience, apply the lobby function (Teams Meeting Options). Note: in case you apply the lobby as manual access-control, there is an additional reason to assign 'presenter' to only event organization; any 'presenter' is namely empowered to allow people in from the lobby. Even external attendees with presenter role can do this, risking the 'access-control' via lobby.
  7. Include 'production' from external device (mixer, encoder) as shared content, do not misuse the possibiliy to include it as 'attendee camera' (see Bad-Practice: Include 'presentation / video production' as camera input in MS Teams Meeting + Teams Live Event).
  8. In case producing without external device, then use PowerPoint Live to include PowerPoint presentation. And leverage Teams Meeeting 'presentation modes' (link) to turn the layout of the digital event in a more professional / (televion) reporter look.

Friday, March 11, 2022

Tip: Reuse authentication of MFA secured account over multiple Connect-PnPOnline calls

A best security practice to connect into SharePoint Online is configure MultiFactor Authentication (MFA). When connecting from PowerShell to SharePoint Online this can give some challenges, as the default 'Credentials' based logon is not MFA aware. Resolution for this is to use either '-Interactive' or '-PnPO365ManagementShell' flag: both result that you are enabled to interactive address the MFA challenge.
Need to address the MFA challenge is acceptable to do one-time. But in an administration context, it might be that you need to execute settings over a set of sitecollections. Then it is not a pleasant experience to everytime need to (re)logon including MFA challenge. Common way to address this is by piping the authenticated SPO connection into the subsequent PnP calls. But Connect-PnPOnline does not support the '-Connection' flag (other PnP cmdlets do support it; PnP is not consistent across all its cmdlets). But I found an alternative that works:
  • $connection = Connect-PnPOnline -Url $spoAdminUrl -PnPO365ManagementShell -ReturnCollection
  • Connect-PnPOnline -Url <Url to other site collection> -Interactive -ClientId $connection.ClientId

Saturday, January 8, 2022

Validate UDP communication in datacenter

When application setup is using UDP connection, and it is experiencing an issue on the UDP communication, as a first check you want to verify whether the UDP traffic is allowed over the network including the firewall(s). For TCP traffic you can use telnet as simple OS command tool, but telnet is not appropriate for UDP.
On a client station one would then typically use a network sniffer as Wireshark to monitor that the UDP traffic can be delivered and received. On a server in the data center this is typical not allowed. And the Windows Server does not include itself a command to verify UDP communication. But you can easily create a validation setup yourself via Windows PowerShell.
A good example/inspiration is post Test UDP connection with PowerShell.
PowerShell cmdlet running on both VMs / nodes in the datacenter
Result of the UDP communication test: both VMs can communicate to each other over UDP <port>

Friday, December 24, 2021

Things to be aware of when embedding video play in Teams Meeting

the presenter clarifies the multiple hop issue that may result for the audience in non-optimal experience when embedding a video play in the Teams meetings.

Awareness 1: Recording misses the video if embedded via PowerPoint live

In this video he also introduces the Microsoft recommendation how to resolve this; namely by uploading the video via PowerPoint already in the Microsoft cloud. With this approach the first 2 hops are avoided. This works like a charm for the people live in the meeting. But a caveat I noticed is that when you need a recording of the meeting for afterwards (re)watch, then the video play is missing.
Include the video play via PowerPoint Live in the Teams Meeting presentation
Video is playing in the Teams Meeting, audience can live watch it
Video play is missing in the recording of the Teams Meeting

Awareness 2: Embed the video as shared content - video play stops on ANY mouseclick

If you need to meetings to be recorded; then you must share the video ‘as content’. The first of the 3 hops can be avoided by storing the video first local on your workstation, and play it from there on a 2nd monitor. Select this 2nd monitor on which playing for sharing in the Teams, and don’t forget to turn on ‘Include computer sound’ ! The video playing is then both visible for the audience 'live' in the meeting, and also included in the Teams meeting recording. Caveat with this setup is that during video play, you must take care not to click your mouse at all. If you do so, it doesn't matter whether in other screen or application; the video play immediate stops, resulting in disrupted experience. If you want to rule out this risk, then the trick is to play the video on another system then the one used for sharing in Teams Meeting (or Live Event). This setup is described in detail by Chris Stegh in his excellent article Sharing Video in Microsoft Teams Meetings.
Include the video play via shared content in the Teams Meeting presentation
Video play is included in the recording of the Teams Meeting

Awareness 3: Reporter layout not propagated into recording

A nice recent addition to Teams Meeting is multiple layout-options for the presenter, contributing to more professional appearance to the audience. However, only the 'live' audience can enjoy it; in the recording the presenter mode is ignored and it always in side-by-side layout. This holds for both approaches: whether including the video via PowerPoint (but this is current a no-go if video AND need recording) and on including as shared content.
Reporter layout for the presenter in the 'live' meeting
Side-by-Side layout for the presenter in the recording of meeting

Sunday, May 30, 2021

Prevent that Azure AD B2B guests are blocked due expired MFA

Azure AD B2B can also be used to authorized identified externals to digital events that your organization hosts, via Teams Live Event or via any streaming platform that is access-control protected via Azure AD. To increase security, enterprise organizations typical employ Multi-Factor Authentication via MS Authenticator App. A problem can be that re-visiting guests have their MFA status expired, but are unaware of that. And then face issue at the moment they want to join the digital event.
To prevent this, better to explicit reset the MFA status before the event. But you should not do this blind for all invited guests, as there are likely also guests that still have and use an active MFA status; e.g. for regular external collaboration with your organization. The trick here is to inspect the latest logon of the guest, and in case this was longer ago then you can safely assume the person is not an heavy guest-user, and for safety sake reset the MFA.
Azure AD does not direct reveal 'last logon' information, but you can utilize that access is granted via OAuth2.0 tokens: Azure AD stores per account 'RefreshTokensValidFromDateTime'; and this value can be interpreted as the datetime of 'last logon' (source: How to find Stale(ish) Azure B2B Guest Accounts)

Saturday, May 22, 2021

Tip: How-To get non-persistent cookie (e.g ASP.NET_SessionId) within PowerShell

Context of my need: a COTS application deployed as Azure WebApp that is also used as REST Api by this webapplication, and the need to automate some of the provision capabilities in this application. The user-based authentication and access control on the Azure WebApp as Api is implemented by leveraging the SharePoint Add-In model, with the remote Azure App launched via AppRedirect.aspx. And next the Api endpoints check the 'SPAppToken' cookie included in Api request, plus the "ASP.NET_SessionId".
The first is rather simple to get hands on in PowerShell code, by 'Invoke_WebRequest' to AppRedirect.aspx with the proper launch parameters; and from the WebResponse object parse the SPAppToken value that is returned in body of the response.
However, the 2nd is more tricky: it is returned as non-persistent cookie in the response, and default not available within PowerShell automation context to read from the WebResponse object. I tried the approach described in Cannot get authentication cookie from web server with Invoke-WebRequest. Without success, but it did inspire me to an alternative approach; and that does work:

  function GetAzureAppASPNetSessionId() {
     $appLaunchCookies = "SPAppToken=$global:AzureSPAppToken&SPSiteUrl=$([System.Web.HttpUtility]::UrlEncode($global:targetSite))"
     $url = "$azureAppLaunchUrl/?SPHostUrl=$([System.Web.HttpUtility]::UrlEncode($global:targetSite))";

     $WebSession = New-Object Microsoft.PowerShell.Commands.WebRequestSession;
     $wr1 = Invoke-WebRequest -Uri $url -Method Post -Body $akuminaCookie -WebSession $WebSession;

     $cookieCont = $WebSession.Cookies.GetCookies($appLaunchCookies);
     $aspNetSessionIdCookie =  $cookieCont | Where {$_.Name -eq "ASP.NET_SessionId" };
     if ($aspNetSessionIdCookie) {
        return $aspNetSessionIdCookie.Value;
    }
}

Sunday, December 13, 2020

Simple pattern to ensure unique element ID inside SPFx React WebPart

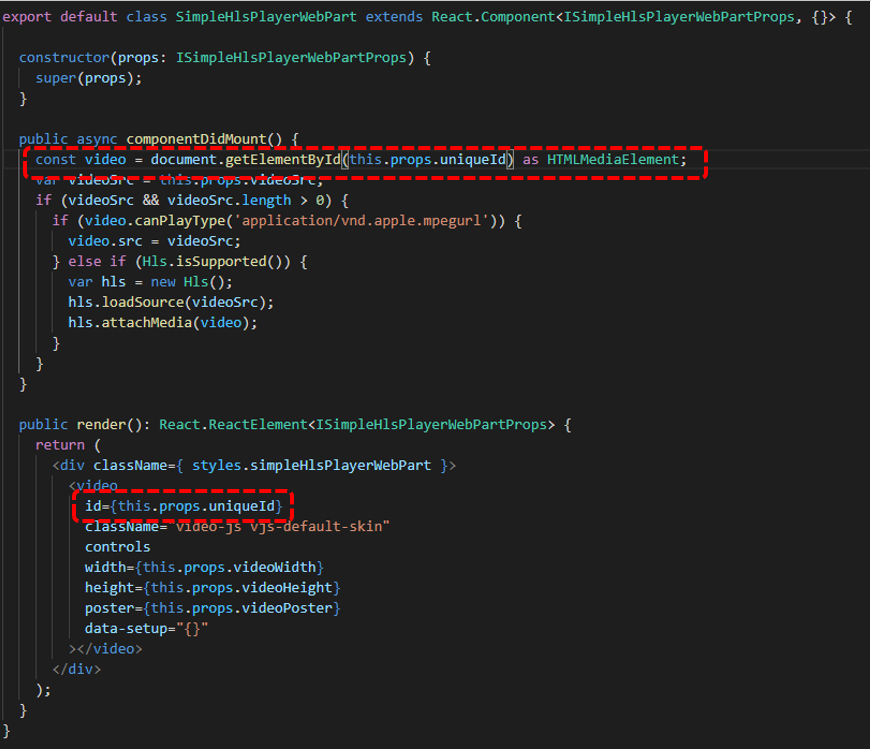
When you build a SharePoint WebPart, you must take into account that the business user can add multiple instances of that webpart on a single page. So the operational execution must be robust for that. In case your webpart relies on HTML element ID, e.g. via 'getElementbyId', then you must ensure that the element ID of each instance is unique. A simple pattern I applied is to derive the ID of the inner React Component on that of the unique ID of the parent React WebPart.
Part 1: Extend the React WebPart Properties interface with a property for unique ID
Part 2: Parent React WebPart derives unique ID from its own, and pushes to the inner React Component
Part 3: Inner React Control applies the received unique ID in its rendering + operation

Friday, October 16, 2020

Tip: how-to self-produce without external encoder into MS Stream Live Event

Webcast production for a Microsoft Stream Live Event is default tied to external encoder. Teams Live Event supports this also, but defaults to simple self-production via Teams App itself. In that case, the live event is not distributed via Stream; nor is the event recording stored within MS Stream. Instead Teams uses its internal Azure Media Services based streaming, and stores the recording somewhere for period of max 180 days after the event is over. Yammer Live Events takes a middle road, or the best of 2 worlds. It supports the same 2 production approaches as Teams - external encoder or via Teams. However, the difference is here within the Teams production handling. Even although produced as a simple Teams Live Event, under the hood this does use Microsoft Stream for the webcast distribution and processing, and after the live event is stopped for the storage of the recording for on-demand watch.
This opens multiple advantages
  • It allows to use the simplicity of Teams production for a webcast, and still embed the video on an event portal (typical hosted via SharePoint Online);
  • It prevent the need for and availability of external encoder (e.g. Wirecast-S, TeraDeck, OBS Studio, ...);
  • Corporations that have employed Ramp Multicast+ as eCDN solution to optimize and control the webcast traffic of Stream on the corporate network, can employ this also for webcasts produced via Teams
Way to apply this approach is by:
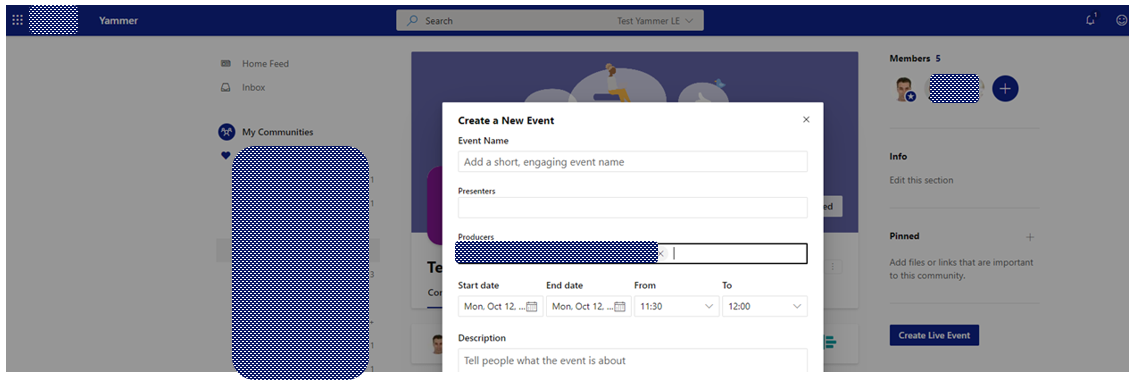
  1. Schedule your webcast as a Yammer Live Event;
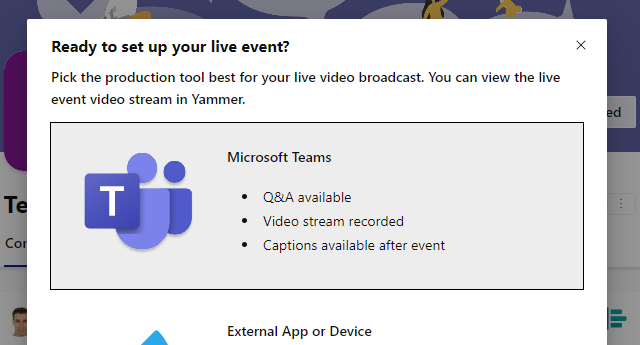
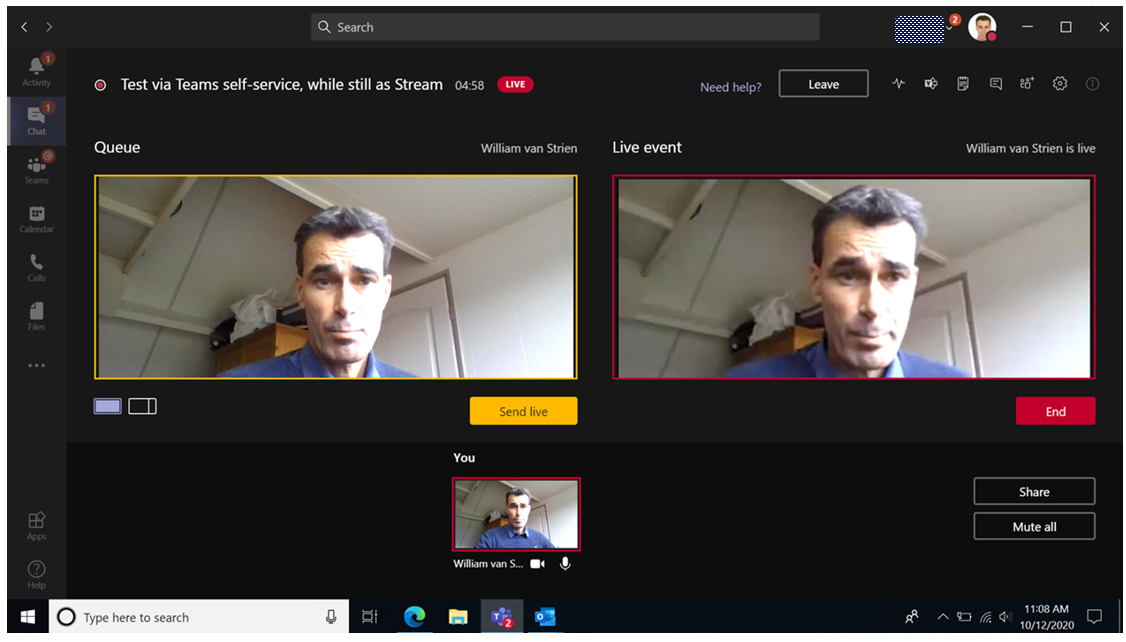
  2. Produce your webcast as a Teams Live Event;
  3. Consume / watch the webcast as a Stream Live Event.
Step 1: Schedule as Yammer Live Event
Step 2: Produce as MS Teams Live Event
Step 3: Consume as MS Stream Live Event, e.g. embedded on SharePoint Online page
Yammer channel determines who is allowed to watch the live event
Something to be aware in case you would apply this approach, is that Yammer then controls who is allowed to watch the live webcast. Namely the members of the Yammer channel in which the Live Event is scheduled. So you must then make sure that all the accounts that are invited as webcast audience, are invited to the 'owning' Yammer channel. It is not possible to extend via Stream portal the permissions of the scheduled Yammer (= Stream) Live Event. After the event ended, then the video recording is 'released' for video management actions through Stream portal.

Sunday, October 4, 2020

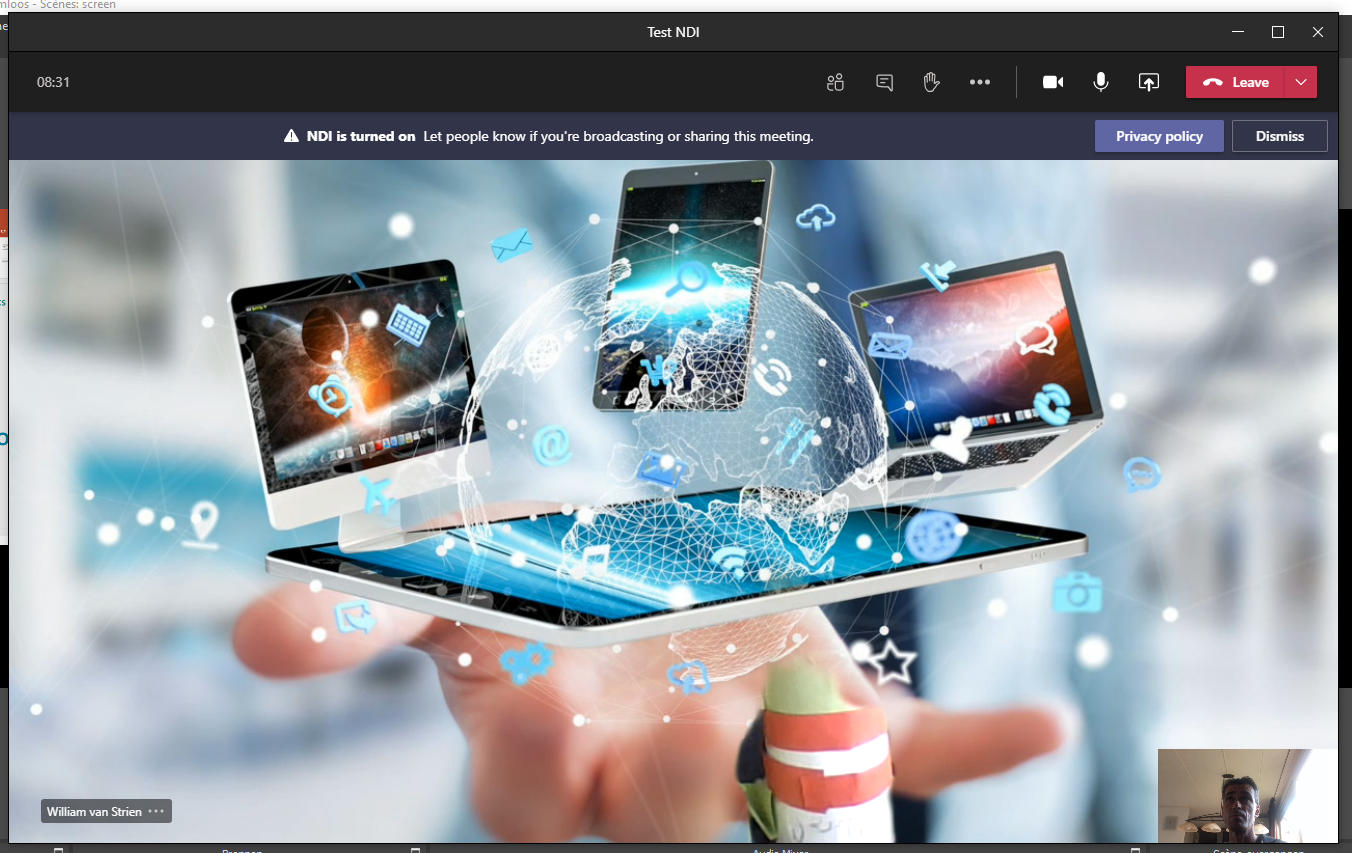
Tip: Teams NDI® only becomes active for capture when 2nd person joins the meeting

The new NDI® capability in Teams is interesting for webcast production, as it allows that you simultaneously combine the video signals of multiple persons in the stream. An use case is for a digital (panel)conversation between 2 or more presenters, which are physical at different places. This scenario is native already possible via Teams Meeting; however then you miss the flexibility in organizing the screen layout of the webcast production. E.g. display another background, display a PowerPoint presentation, switch between picture-in-picture vs full profile; display a ticker message and so on.
As I acknowledge the usability of Teams NDI capability for productive company webcasts, I played around a bit with it: in Teams (MSDN development tenant) configured NDI capability on tenant level (Use NDI® technology in Microsoft Teams) + for own Teams account (Broadcasting audio and video from Teams with NDI® technology); webcam setup (via IVCam) on home system; OBS Studio with NDI plug-in.
While playing, I notice that the NDI signal only becomes active on the network once a second person joins in the Teams meeting. Implication of this is that as producer you cannot prepare a production setup with only you present yet in the Teams meeting. In reality this should not be an issue: the reason to use NDI for capturing is because you want to capture the video of other person or persons. Not that of yourself, that you can just as simple direct capture in OBS Studio (or other encoder) as 'video camera' input.

Screenshots of exploring Teams NDI capability

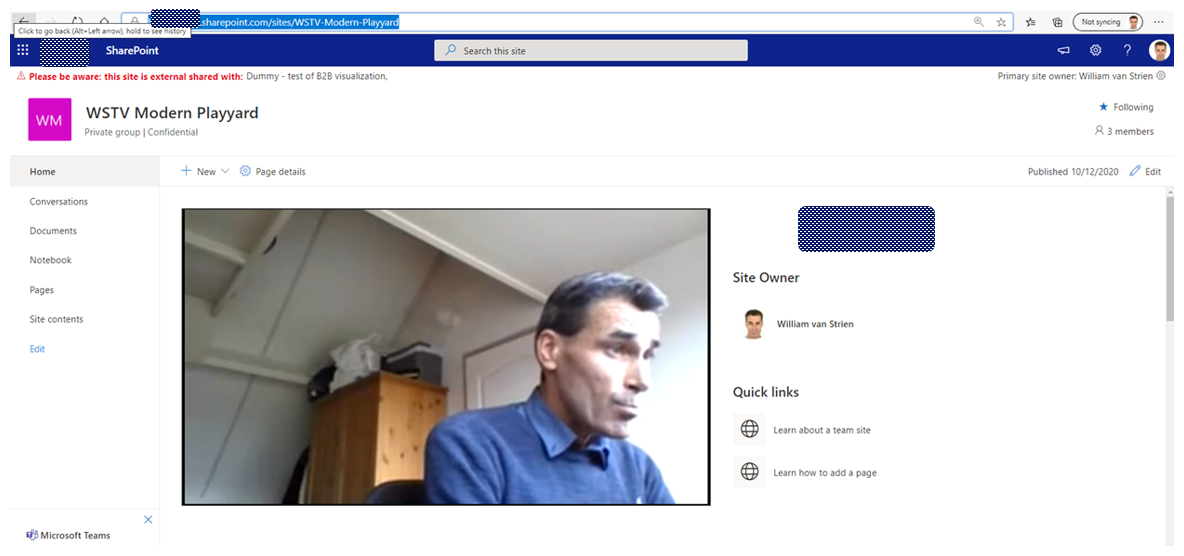
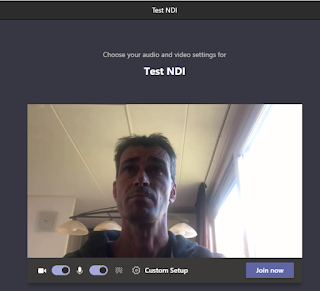
Join as webcast producer / organiser the Teams Meeting, with NDI enabled for yourself
Teams does not yet activate NDI broadcasting, while not actually a meeting of multiple persons
Second person joins the Teams Meeting
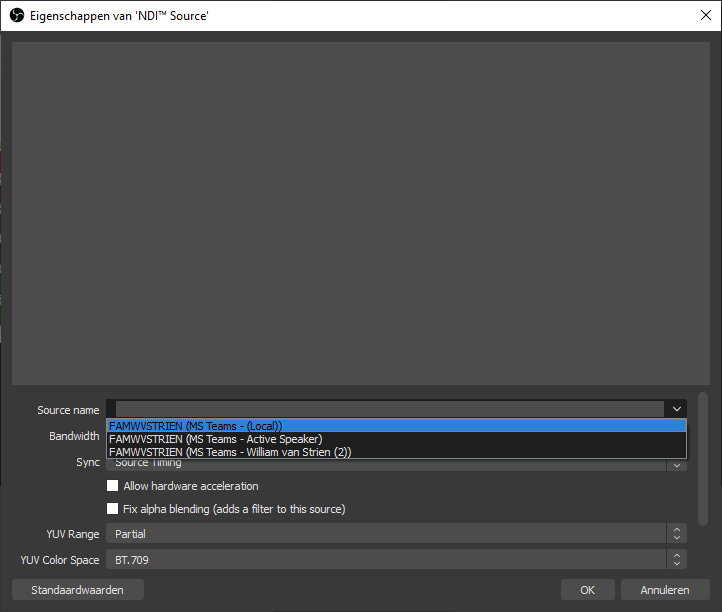
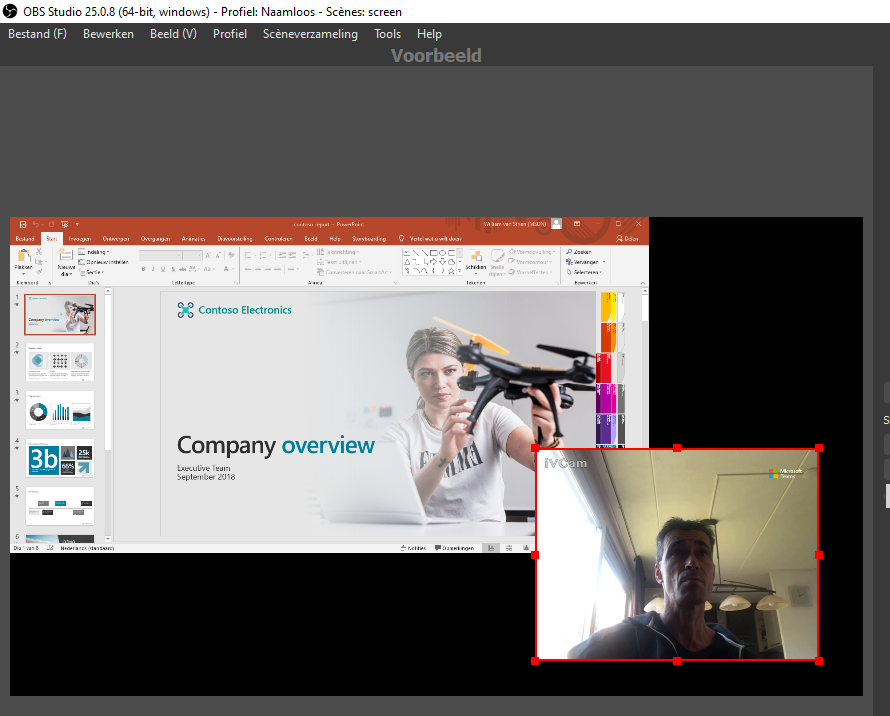
Teams now activated NDI broadcasting, and can be captured in OBS Studio
Once 2nd attendee in the meeting, Teams displays the NDI broadcasting notification

Saturday, July 25, 2020

Beware: Request SharePoint Root Certificate as administrator

On trying the Microsoft advised workaround 1 in situation in which in the SharePoint 2016 central admin server every hour a 'Critical Error' is logged on 'A certificate validation operation took milliseconds and has exceeded the execution time threshold', I initial failed as Get-SPCertificateAuthority returned Null for RootCertificate. The trick / requirement here is to invoke the cmdlet from PowerShell runas administrator:

Wednesday, July 1, 2020

How-to enable for mobile device the seamless consumption of embedded Microsoft Stream on SharePoint page

SharePoint Online Modern Sites/Pages are by-design prepared for mobile / on-the-go consumption. An use case is to embed a Stream video on a page - either on-demand or live event -, and the audience then has the freedom to consume on regular workplace, or via their own mobile device.
However, be aware that in the latter case for seamless Stream behavior it is required that the mobile browser is set to 'Allow All Cookies / Block No Cookies'. Without this, typical the mobile browser fails from within the authenticated SharePoint Online context, next implicit logon the user to the embedded Stream service. The SharePoint Online Product Group confirmed this: To enable in Edge on mobile device seamless MS Stream behavior when embedded on SharePoint Online [modern] page, then infra prerequisite is that mobile Edge is configured to ‘Not block cookies’. The subject is current missing from the requirements stated on Microsoft official Knowledge Base. The Engineering Team will add this to the documentation for further clarity in the future.

Sunday, June 7, 2020

Tip: for customizing on Modern Site shared with B2B guests, use SPFx and not PowerApps

In Modern SharePoint, the citizen-developer way for page customization is through PowerApps (instead of the dreaded InfoPath approach). This works out fine..., unless your site is shared with external Azure AD B2B guests. A condition for PowerApps usage is namely that the logged-on user is licensed for a PowerApps Plan. For regular member accounts this license is typical provisioned on onboarding time. For guest accounts you cannot trust that each of them has a PowerApps license already themselves, and then access to use the PowerApps customization requires that a license is assigned in the inviting tenant. But probably you do not want to assign licenses in the inviting tenant to Azure AD B2B guests. After all, one of the charms of the Azure AD B2B model is that for each paid Azure AD license the organization is entitled to invite up to 5 guest accounts without additional costs.
The result for guests that do not have a PowerApps license themselves, is a broken user experience. Instead of a working custom control / form in the SharePoint page, the guest site visitors are confronted with a notification about need for PowerApps Plan license:
A minimal approach to at least avoid the broken UI experience would be to hide the PowerApps control for guest accounts. But also this is not possible: audience targeting on arbitrary webparts is not supported in Modern Pages, see Overview of audience targeting in modern SharePoint sites.
In a SPFx control you can utilize an alternative for audience check, by check on permission group, or check on account type (member or guest). A code example of this approach: Show and hide SPFx Webpart Content based on user permission.
However, when using SPFx for page customization then you’re not subject to additional licensing on top of SharePoint license. So it would not even be needed to hide the control in case logged-on user is a guest account....
Conclusion: if you plan to share a Modern SharePoint site with external guests, then better not use PowerApps for customizing a page that is accessible for guest accounts. Better approach is via SPFx, and accepts this requires coding skills iso no/low-code.

Friday, April 10, 2020

Tip: How-To determine whether guest email already in-usage in your Azure AD tenant

Invitation of a new Azure AD B2B guest is blocked in case the identifying guest email is already present in the inviting Azure AD. A typical situation in which this occurs is that the intended guest is already present as regular Member account, and has to that the external email associated. To avoid the error on invoking Invite Api and instead send an informed response to the requestor, the B2B invitation automation can check first on any occurence of the external email.
The codeline for that is:
Get-AzureADUser -Filter "proxyAddresses/any(c:c eq 'smtp:external.user@externalComp.com')" | Select UserType, UserState

Thursday, August 15, 2019

Beware with Unique Permissions on PublishingPages, AddAndCustomizePages and Embed Code in a page

Interesting puzzle solved: page authors complained that some of them face an issue when they try to insert a Microsoft Stream video via embed code in the page body:
The message clearly points to missing of 'AddAndCustomizePages' permission for the logged-on page author. However, on checking the permissions, all the authors / editors do have that permission via an assigned 'Content Management' permission level. After some trial-and-error, I discovered the SharePoint internal cause. The below error message on trying to insert a ScriptEditor webpart in the page content, led me to the Eureka insight:
This site says... Aha: In the site the permission inheritance is broken, to achieve that page authors can only create and modify page (= news) items, but are restricted from modifying anything else in the site. The 'Content Management' permission level is for that purpose not assigned to them on site level, but on the Pages library. On required permission for their author task this assignment is sufficient. But a flaw in SharePoint is that it checks in the 'Insert Embed-code' handling whether the 'AddAndCustomizePages' permission is granted to the logged-on author on site level.
With this insight / understanding on SharePoint level, the fix clear: make sure that all the page authors are also granted a permission level on site level that includes the 'AddAndCustomizePages' permission. And with that fix, all page authors are enabled / authorized to user-friendly apply 'Embed Code' in page edit mode:

Thursday, June 20, 2019

Redeploy your SPFx Extension to SharePoint

One of the charms of SPFx Extensions is that they apply tenant-wide: they can be configured for immediate utilization in all modern site collections in your tenant. On SharePoint foundational level this works via the concept of good-old CustomAction that is injected into the context of each modern site collection. In the SPFx Extension package the CustomAction is configured as Feature deployment. Via the parameter 'skipFeatureDeployment' in the package-solution.json (see 'Tenant-scoped solution deployment for SharePoint Framework solutions') you can configure the SPFx Extension to be immediate available across all the sites in the tenant when the solution package is installed to the tenant app catalog, without need to explicit activate the CustomAction feature in each individual site.
This works out fine on the initial deployment of your SPFx extension: the deployed SPFx header automatically is included and active on each site.
On initial deploy, SPFx Extension included once in each modern site
However, in case of need for redeployment, you must be aware of a current glitch: the SPFx Extension gets multiplied per each re-deployment. The cause of this is in how the (semi)immediate and tenant-wide application of the CustomAction is applied. The CustomAction is not injected in the scope of each individual site (Web.UserCustomActions does not include the CustomAction of the SPFx Extension); but is injected as Tenant Wide Extensions. In case of "skipFeatureDeployment": true in the package-solution.json file, on upload / install of the .sppkg file in the tenant App Catalog the administrator is asked to set the 'Make this solution available to all sites in the organization' checkbox. If set, a row is added in the list 'Tenant Wide Extensions' in the App Catalog site. And on re-upload / redeploy, the checked setting is applied again, resulting in duplicate entries for the same SPFx Extension in the Tenant Wide Extensions list. This results that the CustomAction is applied multiple times per each site, and therefore that the SPFx Extension is included multiple times in each site...
As side-effect of re-deploy, SPFx Extension is multiplied in 'Tenant Wide Extensions' list
Result is that the SPFx Extension is included multiple times per each site
Correcting this faulty situation is simple once you know how-to (thanks to Vesa Vujonen for fast response on support question raised): just remove the duplicate entries from the Tenant Wide Extensions list. Mind you, it can take some elapse time before the effect of this is structural applied accross all the WFE's involved in serving the sites of one's tenant.
Fix by removing the duplicate rows in Tenant Wide Extensions
Then the SPFx Extension again included once, and referring to latest package version

Sunday, January 20, 2019

Tip: how-to resolve in SharePoint 2016, XsltListViewWebPart displaying Calculated Fields as HTML-encoded

As of June 2017, Microsoft made a change to explicit block in XlstListViewWebPart the rendering of custom HTML markup in Calculated Fields: Handling HTML markup in SharePoint calculated fields: "Some users have added HTML markup or script elements to calculated fields. This is an undocumented use of the feature, and we will block the execution of custom markup in calculated fields in SharePoint Online from June 13, 2017 onwards. The June 2017 Public Update (PU) and later PUs will make blocking a configurable option for on-premises use in SharePoint Server 2016 and SharePoint Server 2013." In the article, Microsoft states that for SharePoint on-premises (2013 version and later) one can restore to the previous behavior through a new property on webapplication level: CustomMarkupInCalculatedFieldDisabled. For SharePoint Online there is no such configuration option provided.
A bit by coincidence (and also by mere perseverance 😉), I detected an alternative - undocumented - approach that does not require an overall webapplication setting. And as bonus, likely also works in SPO context. Default the XslLink property in XsltListViewWebPart XmlDefinition is configured via the View property: SPView.XslLink. The essence of the workaround / approach is to make use of the Xsl-behavior in the superclass of XsltListViewWebPart: DataFormWebPart. If you specify Xslt transformation at that level (either via XslLink, or via Xsl property), then you can configure for single XsltListViewWebPart instance that custom HTML markup of Calculated Field is still executed.
Although undocumented, it is an own Microsoft source that helped me discovering this => the SharePoint Escalation Service Team Blog - Guidance for XslLink property with the XsltListViewWebPart: "There exist other alternatives to let the XsltListViewWebPart use your XSL Transform. "
Note also that when you used 'Design' mode in SharePoint Designer 2010 to customize the Xslt-rendering of a list column, the customized Xslt-template is also injected in the Xsl property on webpart level.
My findings clarified through pictures:

At first the issue: custom HTML markup of Calculated Field is rendered as html-encoded

Move in the XMLDefinition the location of XslLink from 'View' to 'WebPart' level

And the rendering of custom HTML markup is restored, as we know it from before

Thing to be aware of: with using the 'XslLink' property it is a prerequisite that the applied Xslt stylesheet file is located in the layouts folder (see: Guidance for XslLink property with the XsltListViewWebPart: "however you would need to place your XSL file in the default “_layouts/xsl” folder"). In the above scenario that is guaranteed as I simply refer to the standard 'main.xsl' stylesheet that is by Microsoft itself provisioned in the layouts folder, both on-premises as online. If however you need a deviation from the standard XsltListViewWebPart rendering, then you need to provision your own custom Xsl stylesheet thus also in the layouts folder. Which in SharePoint Online context is of course not possible. If the deviation is only minimal, e.g. to override the standard rendering for only one column, then I advise to make use of the 'Xsl' property instead, and only include in it the overloading 'xsl:template'.
Example applied to scenario of above
<xsl>
   <xsl:stylesheet xmlns:x="http://www.w3.org/2001/XMLSchema" 
      xmlns:d="http://schemas.microsoft.com/sharepoint/dsp" 
      version="1.0" 
      exclude-result-prefixes="xsl msxsl ddwrt" 
      xmlns:ddwrt="http://schemas.microsoft.com/WebParts/v2/DataView/runtime" 
      xmlns:asp="http://schemas.microsoft.com/ASPNET/20" 
      xmlns:__designer="http://schemas.microsoft.com/WebParts/v2/DataView/designer" 
      xmlns:xsl="http://www.w3.org/1999/XSL/Transform" 
      xmlns:msxsl="urn:schemas-microsoft-com:xslt" 
      xmlns:SharePoint="Microsoft.SharePoint.WebControls" 
      xmlns:ddwrt2="urn:frontpage:internal" 
      xmlns:o="urn:schemas-microsoft-com:office:office">
         <xsl:include href="/_layouts/15/xsl/main.xsl"/>
         <xsl:include href="/_layouts/15/xsl/internal.xsl"/>
         <xsl:param name="AllRows" select="/dsQueryResponse/Rows/Row[$EntityName = '' or (position() >= $FirstRow and position() <= $LastRow)]"/>
         <xsl:param name="dvt_apos">'</xsl:param>                                                      
         <xsl:template match="FieldRef[@Name='Folder']" mode="Number_body">
            <xsl:param name="thisNode" select="."/>
            <b><i>
            <xsl:value-of disable-output-escaping="yes" select="$thisNode/@*[name()=current()/@Name]" />
            </i></b>
         </xsl:template>
   </xsl:stylesheet>
</xsl>